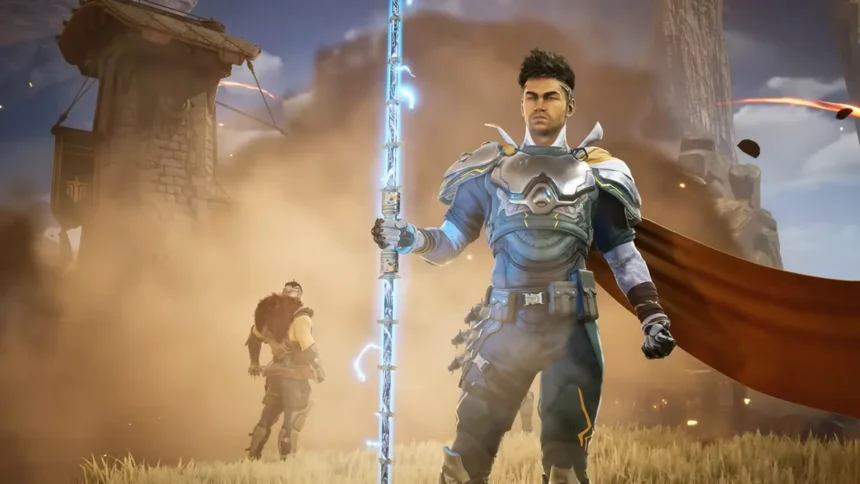
In the intense chaos of a Highguard raid, knowing the map is half the battle. But knowing the Highguard Shieldbreaker locations is what separates the newbies from the victors.
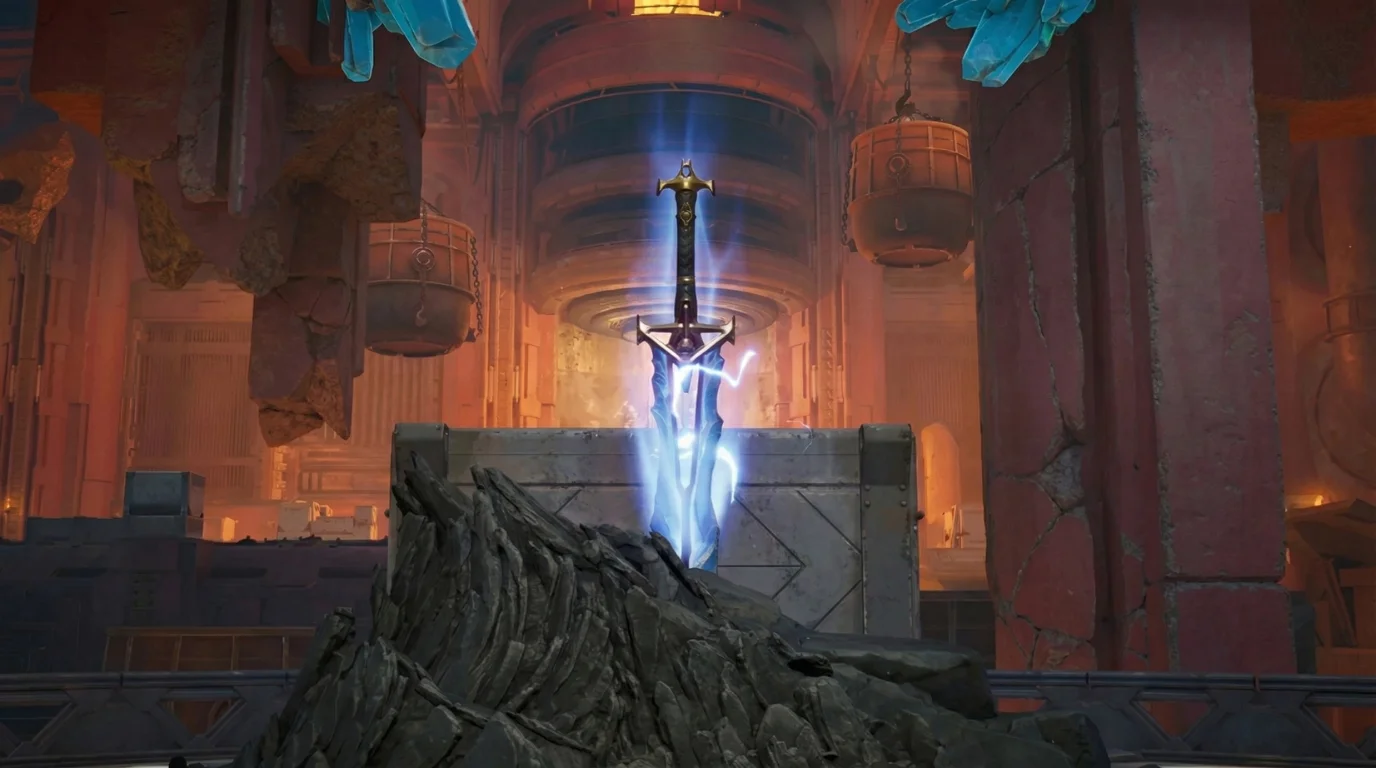
This glowing mystical sword isn’t just loot—it is the game’s core objective. Spawning randomly during the Intercept phase, the Shieldbreaker is the only key to summoning the Domesplitter siege tower and breaching enemy bases. If you don’t grab it, you don’t raid.
This guide covers all five maps with precise spawn sites, pro grab tactics, and strategies to dominate the Intercept phase.
Also Read: Highguard Raid Shooter: Release Date & Gameplay Guide
What is the Shieldbreaker?
The Shieldbreaker is a massive sword that spawns after the Gear Up (looting) and Defense (fortifying) phases.
Pro tip: It glows bright for visibility but carriers become team targets, spread out post-grab. No camping, spawns rotate to force fights.
All Highguard Shieldbreaker Locations by Map
Highguard Shieldbreaker locations randomize among three fixed sites per map, always central for epic clashes. Scout with Recon Wardens, clear chests en route. Here’s the full breakdown, bookmark for your next queue.
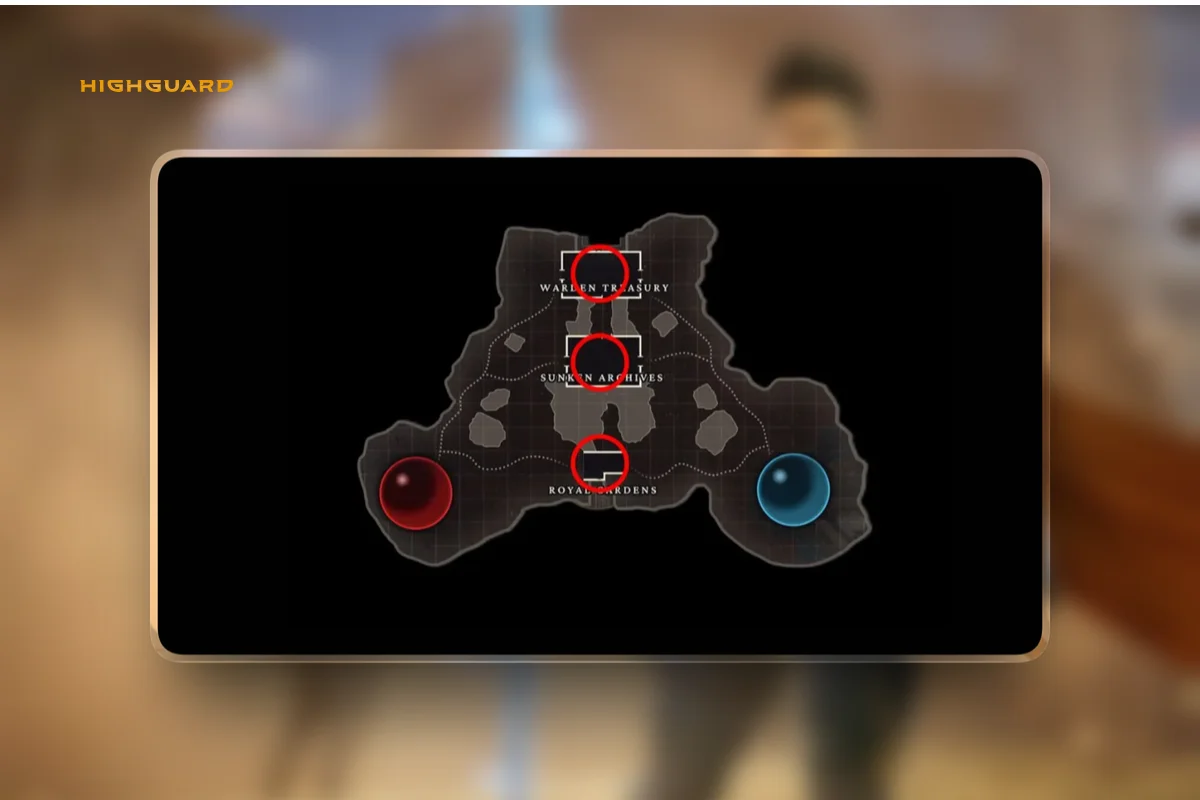
1. Vesper City Highguard Shieldbreaker Locations
Urban chaos reigns here. Common grabs under 30 seconds if coordinated.
| Exact Spawn Location | Description & Strategy |
| Warden’s Treasury | The Hot Zone. Located dead center. This is a loot-rich hub, so expect resistance immediately. Tactic: Flank from the alleys to avoid sniper nests. Ideal for Assault Wardens who can brawl up close. |
| Royal Gardens | The High Ground. Located on elevated platforms accessible via ziplines. Tactic: Use Support Wardens to heal while Snipers control the heights. |
| Sunken Archives | The CQC Trap. An underground area perfect for close-quarters combat. Tactic: Bring shotguns. Revive teammates quickly, as cover is tight. |
2. Kingdom Highguard Shieldbreaker Locations
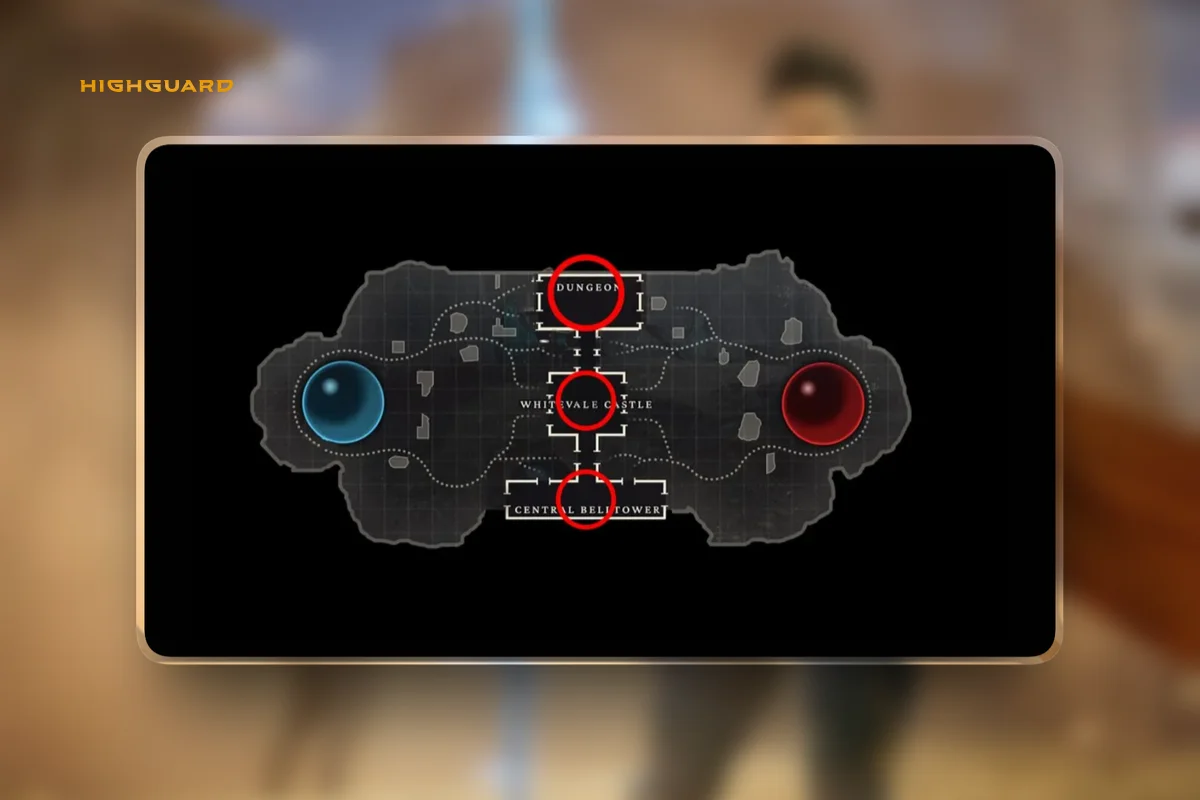
Castle vibes with dark twists, perfect for ambushes.
| Exact Spawn Location | Description & Strategy |
| Whitevale Castle | The Killbox. An indoor location vulnerable to Area of Effect (AoE) attacks. Tactic: Save your Ultimates. A combo wipe here clears the lobby. |
| Central Belltower | The Sniper’s Dream. An open corridor beneath the tower. Tactic: High visibility means high danger. Crossfire the spawn and have mounts ready for a fast escape. |
| The Dungeon | The Labyrinth. Located beneath the castle. Tactic: Push as a 3v3 squad. Do not go alone. Secure knocks to regenerate health before grabbing. |
3. Summit Highguard Shieldbreaker Locations
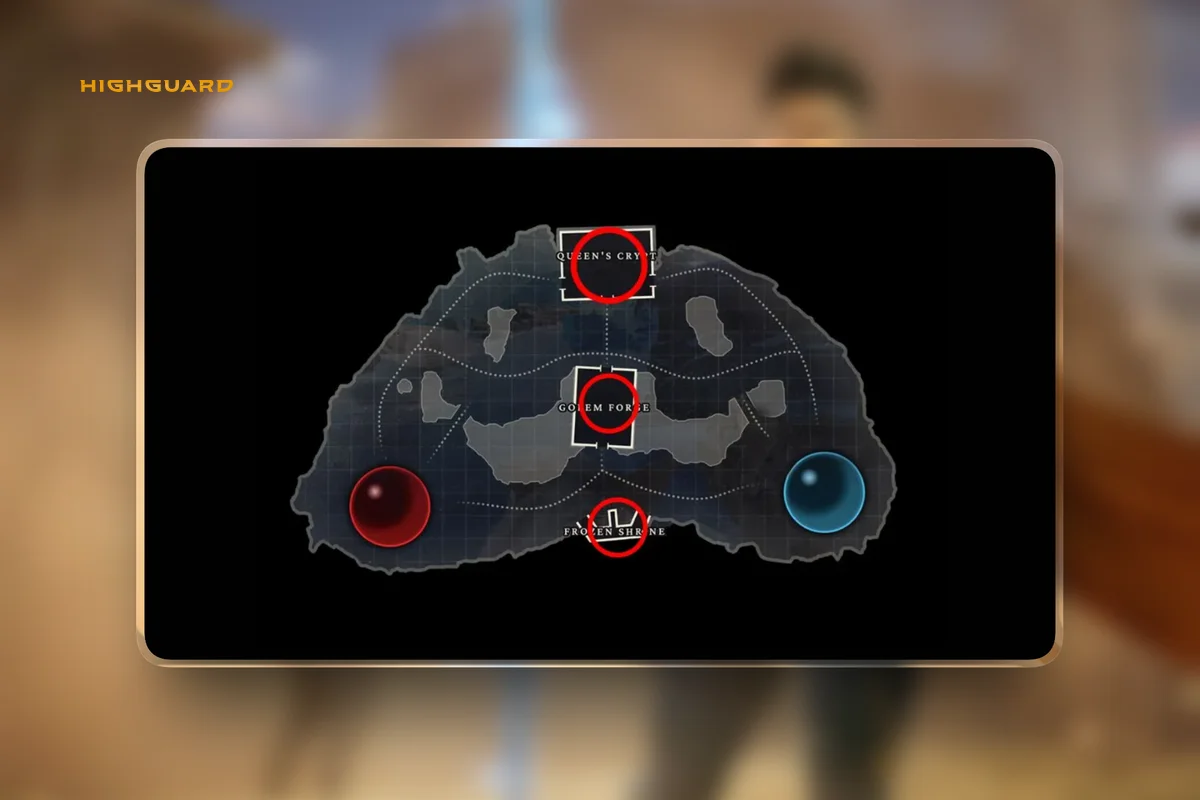
Icy industrial hell, verticality kills.
| Exact Spawn Location | Description & Strategy |
| Golem Forge | The Furnace. A central industrial zone. Tactic: Control the lanes. Use Vesper mines mid-fight to deter pursuers. |
| Queen’s Crypt | The Gap. Accessible via ziplines over deep trenches. Tactic: Trench-hop carefully. Knockback abilities here can cause instant fall deaths for enemies. |
| Frozen Shrine | The Choke. Features dual narrow paths leading to the spawn. Tactic: Funnel enemies into the choke points. Snipers are optional; explosives are better. |
4. Rivermark Highguard Shieldbreaker Locations
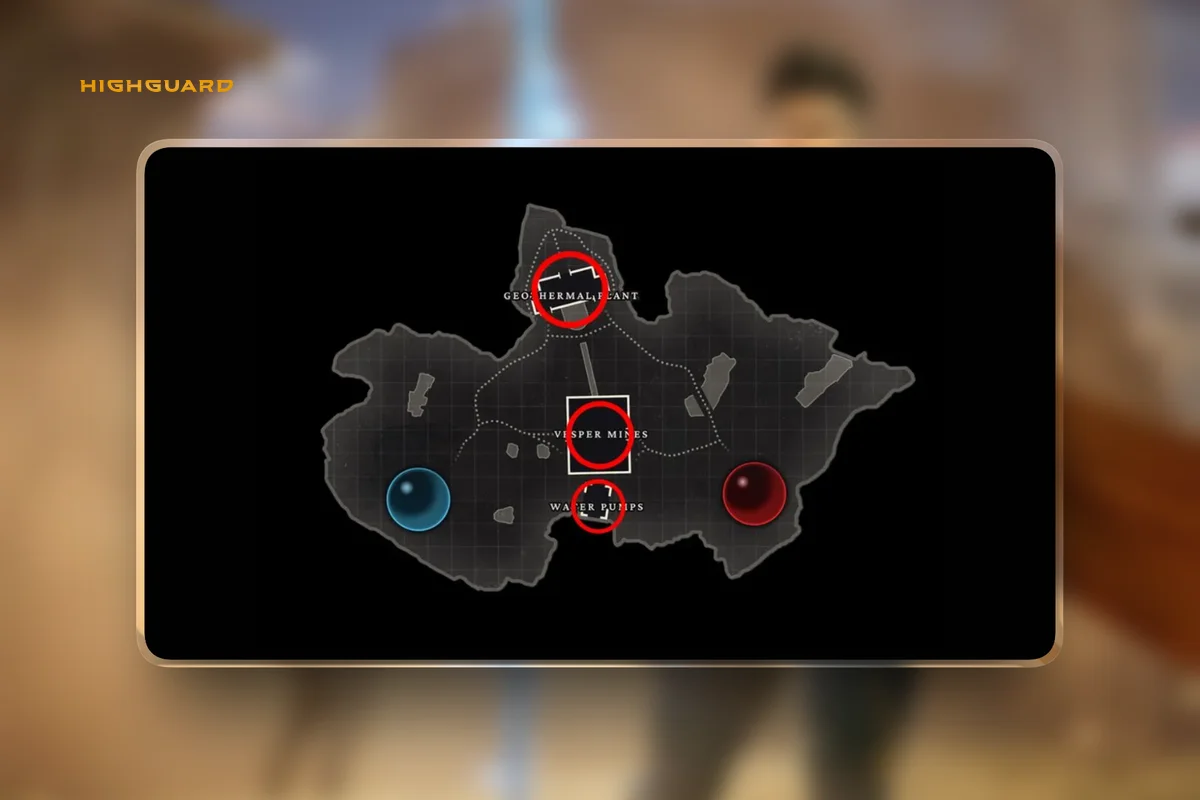
Industrial wasteland with water hazards, ziplines and mounts shine for quick rotations. Highguard Shieldbreaker locations here favor speed grabs and stealth flanks.
| Exact Spawn Location | Description & Strategy |
| Vesper Mines | The Racetrack. Central mineshafts packed with Vesper. Tactic: Grab and mount-escape immediately. There are minimal chokepoints, so speed is your only defense. |
| Water Pumps | The Maze. A central platform surrounded by filtration tanks. Tactic: Use hidden passages for stealth approaches to ambush the enemy carrying team. |
| Geothermal Plant | The Aerie. Upper platforms requiring ziplines. Tactic: Air control is essential. Drop from above for a surprise plant. |
5. Dustline Highguard Shieldbreaker Locations
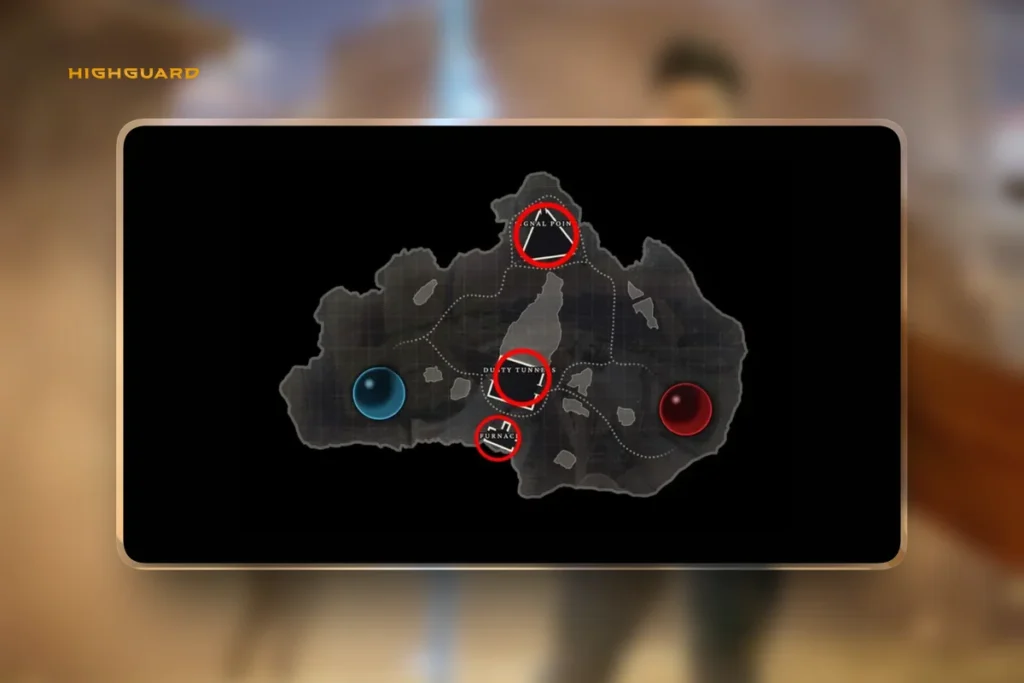
Underground dust-choked tunnels, pure chaos in cramped spaces. Expect ambushes at every Highguard Shieldbreaker locations turn.
| Exact Spawn Location | Description & Strategy |
| Signal Point | The Stage. Main terminal room with open sightlines. Tactic: Defenders can easily crossfire this spot. Smoke or shielding is required for the grab. |
| Dusty Tunnels | The Brawl. A cramped underground chamber. Tactic: CQC (Close Quarters Combat) weapons like shotguns are mandatory. Secure revives mid-fight or you will be overrun. |
| The Furnace | The Trap. Narrow pathways ripe for traps. Tactic: Stack your team on the flanks. Avoid solo pushes at all costs. |
Pro Strategies: How to Secure the Shieldbreaker
Finding the location is step one. Getting out alive is step two. Here is how top queues are playing the Intercept phase:
1. The “Pre-Scout” Rotation
Don’t wait for the timer. Send Recon Wardens to scout the central locations as the Gear Up phase ends. Spot the cloud timer early, and rotate your team before the icon even appears on the HUD.
2. Team Composition Roles
- Assault: The Carrier. They grab the sword and push.
- Recon: The Scout. They find the spawn and watch for flanks.
- Support: The Lifeline. Focus on healing and reviving the carrier.
- Defense: The Rearguard. Hold the flanks and slow down pursuers
3. The “Bait and Switch”
A common pro tactic is to counter-camp. Bait the enemy into grabbing the sword, then wipe them with a chained Ultimate combo (like Powerstorm + Beast Roar). Once they are wiped, you have a free path to the enemy base.
4. Don’t Ignore Mechanics
- Vesper Mining: Pro move—mine Vesper mid-Intercept to upgrade your gear while the enemy is distracted.
- Win Condition: Remember, Highguard is about territory control, not just kills. If you wipe the enemy but don’t push the Anchor Stone, you gain nothing.
You May Also Like: Highguard Wardens all 8 Characters & their Abilities (2026)
FAQs
Where are the Highguard Shieldbreaker locations?
Does the Shieldbreaker spawn in every match?
Yes, but only during the Intercept Phase. It does not spawn during the Gear Up phase.
Which Warden is best for carrying the Shieldbreaker?
Assault class Wardens are best for the push due to their combat stats, while Recon Wardens are best for finding it quickly.
How do I practice finding the spawns?
Use the Training Grounds. You can run Shieldbreaker simulations, practice reinforcing, and test mount rotations without the pressure of a live match.

